Yes, there is actual progress! In my studio! And I have photos to prove it! Spousal Unit loves me so much, he kept his promise to help set up my studio space today, even though it was about 187 degrees and 318% humidity. (OK, I am exaggerating, but only a little.) So, I thought I’d post a little “In Progress” to give you an idea of what I’m working on…
To begin with, I need to explain that we have a bit of an odd layout for our house. The garage is located in the back of the house, but there is no driveway back to it. In fact, our driveway stops by the front corner of the house, so the only way to get back around there is across the side and back yards (and now through a gate in the new fence), or to go through the house, down to the basement, and out through the laundry room. Which is to say, we are not planning on parking any vehicles in there. Not even Spousal Unit’s little fishing boat. So, it is the perfect storage/studio space for us. Well, maybe not “perfect”, as there is no heat or air conditioning back there, but it’s almost pure potential. Plus, none of the other rooms in the house will work (for long, anyway). Go ahead: ask me about the dining room.
So, here are a few shots of what I had to start with:
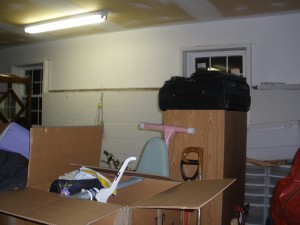
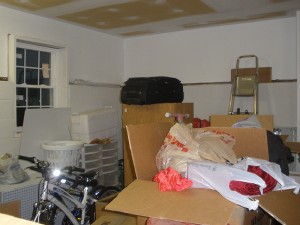
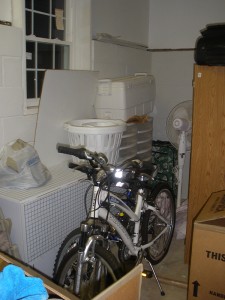
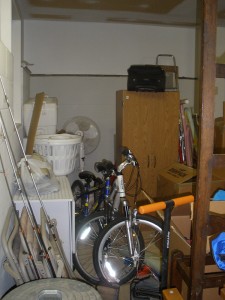
Since the back of the garage sits at the back of the house, that “back” wall is the wall with the door to the back of the house, through the laundry room (you can’t see it in these photos). That is the end of the room that will have the “entrance” to my studio area. Sorry, but I couldn’t get any decent shots of the front of the garage (the end farthest from the house), as there was too much stuff in the way. Suffice to say, it was pretty crowded back there, too.
I was originally allotted a space 8 feet wide by 17 feet long, which is not a lot of room for workspace and storage. If you will recall, I had posted several plans for my studio layout (see this, that and the other). Well, you remember that old saying about “best laid plans”? Yeah. Me, too. Some things didn’t work out so great. But other things? Oh, man! Other things worked out FABULOUSLY! Like, I got an extra 4 feet or so of length, and maybe another foot of width in my floorplan! AND… I was able to work some extra pieces into the mix that look oh-so-much-better than plastic! Like an old stained and verathaned wooden dresser-thing (I can’t remember what this piece of furniture is actually called) [edit: it’s an armoire] that my dad put together for me from a kit when I was a teenager (my dad loves me, too). It has some scratches, and it’s a very dark color (dark walnut, maybe?), but it’s still in pretty good shape. And a vintage sewing machine in a cool table. And an antique gate-leg table I bought several years ago. And I found a spot to store my old floor loom and spinning wheel – which both work! (although I’m considering selling them, and the supplies that go with them) – without resorting to the rented storage space. (Yes, we have rented storage space, in addition to the garage. And no, I’m not a hoarder! I collect interesting things…. And I buy lots of materials for any project I plan, just to make sure I don’t run out. And I buy materials because they look cool, and I might make something with them. Someday.)
So, anyway, Spousal Unit and Man-Child worked in the garage for a couple of hours. First, they took everything out of “my” side of the garage, swept it up a little (emphasis on little), then grabbed my printed floorplan and started moving stuff around. By the time I went in to help them place things a few minutes later, they were already beginning to place the big pieces. By the time we finished rearranging things, this is what we had:
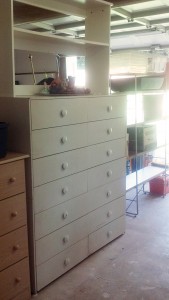
First, that is the huge white dresser my dad made for me FROM SCRATCH when I was a kid (I told you my dad loves me!). The hutch on top was from IKEA, and just fits perfectly for more horizontal space for storage. You can also see one set of the cool shelves my sister gave me.
The dresser used to be painted orange and yellow (not at the same time), and there are scratches where the old super-high-gloss paint shows through. Here are some closeups of the damage done to this poor old thing (Hey, the thing is about 40 years old, and has moved with me maybe a dozen times!):
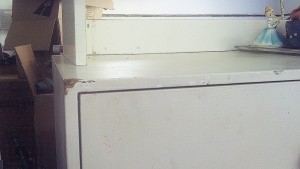
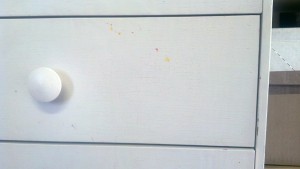
See? I told you it used to be orange and yellow!
Another view of the studio in progress:
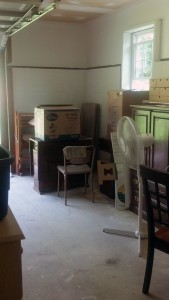
Back in the corner there, you can just see one side of my floor loom, right behind my pretty antique gate-leg table, which is just to the left of a vintage Singer sewing machine (circa 1950-1960), in a lovely vintage cabinet. Next to that is the armoire my dad made for me from a kit back when I was a teenager, as mentioned above. It’s a bit dark, but it might work for what I need. I’m thinking about whether or not to use different hardware for the pulls, though. Here is a better view of it:
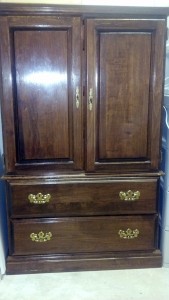
If you click the image, you will see a larger version, which clearly shows those brass pulls have… keyholes! Yes!! And the pulls on the doors are “keys“! My dad built me a Steampunk dresser before Steampunk existed!! How cool is that?!
And here is a view of the armoire open:
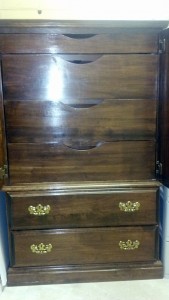
As you can see, there are 4 more drawers behind the doors. And although it’s dark, I still love it. I’m just not sure whether to leave it dark, or even “as is” (since it’s already kinda Steamy), or to try to change it. It does have some dings and dents (well, it’s something like 30 years old; what did you expect?), and it’s not quite level. Still, it’s going to be great closed storage for fabrics and supplies!
And here is a view looking towards the house, which is the “back” of the garage (you can see the door leading into the house and laundry room on the right).
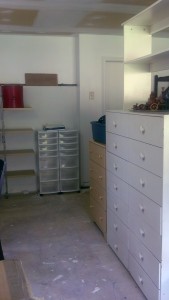
From this angle, you can see the small brown “wood” dresser we bought a few years ago. It has that nasty plastic coating on it, but isn’t solid wood. The big white dresser and little brown dresser are 2 of the pieces I plan on repainting. In the background, you can see the edge of the other set of shelves I got from my sister, and two plastic storage drawers I can use for some of my craft supplies. Oh, and that red thing on the shelf? That’s my wig box! There’s at least 3 wigs in there (maybe 4) from my con days, back in the 80s. Yes, I was a con-going, costuming, D&D-playing Geek and Gamer Girl. Those were the days…. ::sigh::
And here is one more shot:
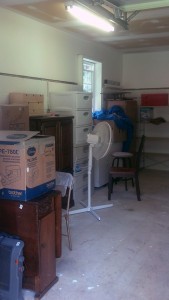
In this shot, you can plainly see the ugly fluorescent tube light fixture on the unpainted ceiling, and the bare concrete floor, along with some clutter that shall be dealt with in the near future. There is also a shot of part of my antique gate-leg table on the left side foreground. It’s very pretty! I’ll try to get a decent shot of it one of these days.
Oh, and that dark line that goes around the room at about 6 feet off the floor? That’s where the cinder block wall meets the not-cinder-block wall above it. (What is that? Is it perhaps drywall on studs? I never saw an exterior wall built like that.) It creates a narrow “shelf”, about 3 or 4 inches deep, almost all the way around the side and back walls. This has some potential for good, like for placing artwork up there. But that line is the unpainted part of the wall. [edit: Actually, that “unpainted line” is where the drywall hits the wooden framing on top of the cinder block wall, but doesn’t cover it. Not sure yet how I’m going to fix that…] That will have to change. Soon. Along with the ceiling. And the light fixture, if I can find someone to help me change it out, without killing someone or setting the house on fire. Seriously.
Speaking of artwork, I was super-pleased when Man-Child and Woman-Child came to me and asked if they could pick out a couple of pieces of some art I had made and put in their rooms. This, after Spousal Unit used some disparaging words to describe those paintings, which were in search of a place to hang out when the kids asked to have them. I let them have their pick, grinning from ear to ear! Yay! My kids like my art! 🙂
Way back in the corner, you can almost see a medium-brown cabinet. This is the third piece that I plan to paint. Let’s see if I can get a better shot of it:
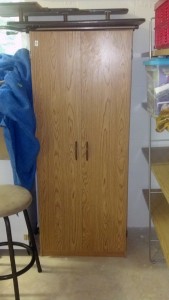
As you can see, this is a very inexpensive, wood-grain-veneered, self-built particle board cabinet with cheap plastic pulls. This was purchased by my darling Spousal Unit before he and I met, so I know it’s more than 14 years old. Yes, it’s cheap, but it has so far withstood moving at least 3 times (twice across the Atlantic Ocean). Plus, this:
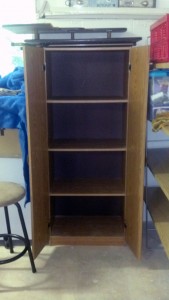
Who could say no to all that horizontal storage space behind closed doors? Especially in a dusty space like this! Since I already have it, it’s costing me nothing to keep it. Other than whatever I buy to make it more attractive, anyway. Which I’m still working to decide on, by the way. Only now I’m leaning toward a Steampunk concept. But no, I’m not going to “just glue some gears on it“. But I found this today:
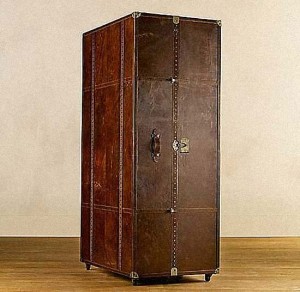
This is apparently a Steamer Secretary – basically a portable office. The latch unclips, and the trunk opens out to a larger desk and drawers setup. Go on over to Curbly.com for the view of the piece open and ready for work. Two caveats: First, apparently, this piece sold for about $4,000. Second, it’s no longer available on the designer’s site (Restoration Hardware). ::sniff::
However, don’t let that stop you from looking through their site! So full of Steamy goodness! Lots of Steamy eye candy over there. So, go ahead and browse through Restoration Hardware. I’ll wait for you here.
Um, okay, so where were we….?
Oh! Yeah, that’s right. My studio.
I will definitely need to install an A/C unit in one of the windows, and I’ve already stashed a portable heater in there for the cold months. I’ll likely leave the floor bare concrete, since that will be easier to clean than some sort of carpet. You can see the fan I’ve put in there to move the air around a bit. But I can tell you, it’s not very effective against heat and humidity. And it will likely blow my supplies around some, too. Which may actually be an incentive to keep things put away. Maybe. We’ll have to see.
Oh, and remember back when I was talking about ideas for “walling off” my studio, to try to keep the dust down? Yeah, well, it turns out that It. Won’t. Work. At. All. The garage door rolls up right into the area where the two walls would meet. So, now I’m thinking about at least backing some of the shelves and such with foam core (probably either painted, or wrapped with fabric), attaching it securely to the backs of the shelves, and letting that become part of a non-existant wall. Or something. And maybe hanging fabric where I can, so Spousal Unit doesn’t have to be exposed too much to my typically messy … uhhh… untidy…. err… creative workspace. With lots of clutter. Which I’m sure will happen, no matter how hard I try to keep things tidy. Because that’s just how I am.
So, as you can see from today’s photos above, the studio is nowhere near finished yet, and will likely take some time to get fully functional. But at least now I’ll be able to start rooting around through several hundred boxes, sorting out all sorts of fabric, equipment and other crafty items that will need to find a place. If I can stop looking at Pinterest, Epbot.com and Restoration Hardware long enough to get anything else done. Like laundry. And sleep. And my day job. You know, little things like that.