Today’s tutorial is on how to create a button bouquet. Button bouquets have become a fun alternative to fresh flowers, both for weddings and for general decorative purposes. The benefits include the ability to mix and match specific colors and the fact that they don’t wilt. You won’t save money by making a button bouquet over a fresh flower one, but it will last much longer.
I have seen some button bouquets in a single color, a limited number of colors (generally 2 or 3), and a whole rainbow of candy colors. I have even seen several done entirely in sparkly rhinestone buttons. The beauty of this crafting technique is its versatility. You can make it as formal or casual as you like.
Part II is here… and Part III is here…
Let’s get started…
You will need:
- Buttons in assorted sizes, in the color(s) and style(s) of your choice, enough to make as many stems as you need
- Wire – 20 gauge or 22 gauge works well, and it comes in a variety of colors and finishes, and is generally found by the roll in craft stores
- Wire cutters – I recommend “jewelry-making” wire cutters, as they are smaller and lighter weight
- Flat-nose pliers – again, I recommend the smaller “jewelry-making” style for its small size and light weight
Optional:
- Polymer Clay in the color(s) and brand of your choice
- Tulle
- Felt in the color of your choice
- Embroidery floss (yep, pick your color(s))
- Beads in the color and style of your choice
- Any other small objects you would like to include, such as jewelry or findings, gears or watch parts (for a steampunk look), tiny toys, etc.
Step One:
Decide how tall you would like the bouquet. I recommend cutting the wire at least 1/2 again as long as you want the bouquet to stand. You can always cut the wire shorter, but it will be difficult to add length to the finished piece. So, if you want a 10″ tall bouquet, cut the wire 15 “.
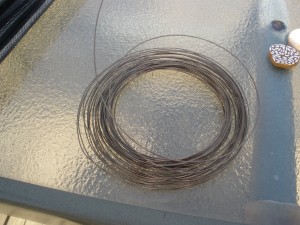
You can either cut the wire as you create each stem, or you can cut it all at once. Determine the length you need, measure the wire, then cut the wire to the desired length with the wire cutters. Do not use scissors as this will dull and nick the blades very quickly.
Step Two:
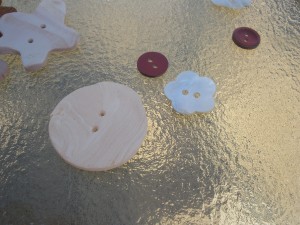
You may wish to make a few practice stacks of your buttons before you begin making the stems. Select buttons in different sizes, and stack them largest to smallest. You can choose anything from 1 to 5 or more buttons, depending on your selection, and the effect you want. This is the time to experiment!
Step Three:
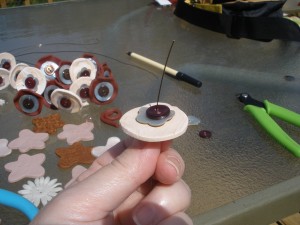
Holding the wire in one hand, begin stacking the buttons from one stack on the wire by running the wire through one of the button holes.
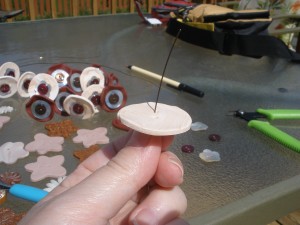
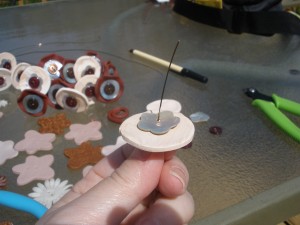
Here I have used a handmade Sculpey button as my base. You can see the wire poking through one of the two holes in the button. Hold the wire just below the button, with about 2 or 3 inches of the wire extending above the base button. Continue stacking more buttons on top of the base.
Step Four:
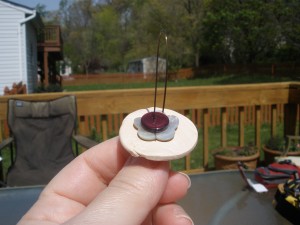
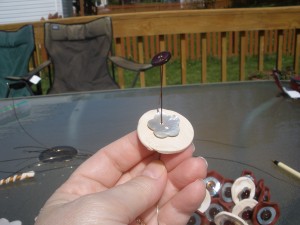
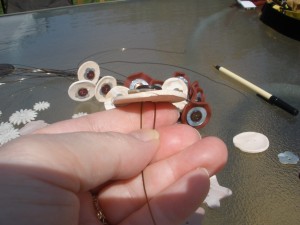
Bend the top of the wire over about 2 inches or so, more if you have a large stack of buttons, and poke the end back through the button stack, one button at a time. If you have one hole in the top button, you will need a bead to make sure the button doesn’t pop off the wire. If you have 4 holes in any of the buttons in the stack, be sure to use the hole opposite the first wired hole when coming back down through the button stack.
Step Five:
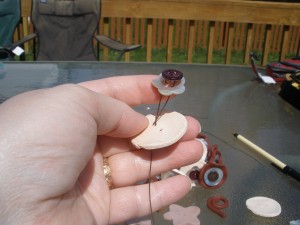
Once you have the all the buttons pushed up tight against the bend in the wire, begin twisting the end of the wire and the stem together. Rather than twisting one piece around the other, try to make the twist as even as possible. An easy way to do this is to hold the wire under the button stack together with a pair of flat-nose pliers. Gently pull the stack of buttons toward the bend in the wire, and twist the bead stack away from your body. Continue twisting until you have a nice, even twist in the wire below the button stack.
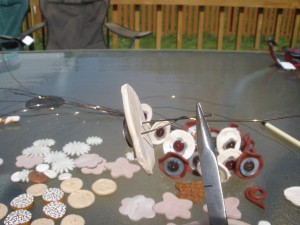
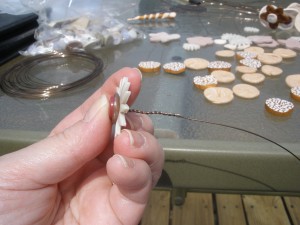
And that’s pretty much all there is to it!
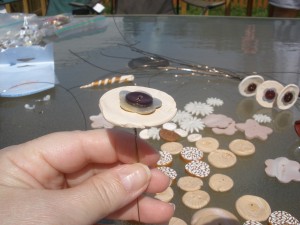
Now, you just need to do that again for however many stems you need. 🙂
And here is a photo of the bunch I finished in just a few hours:
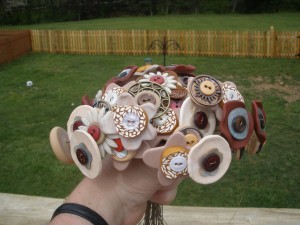
A few more ideas:
Here are a few more ideas for button stacks:
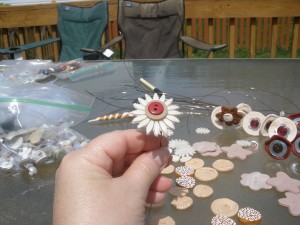
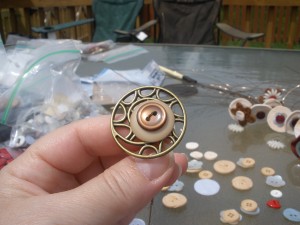
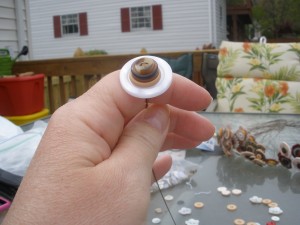
Here are the first 12 stems I made:
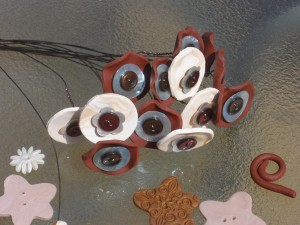
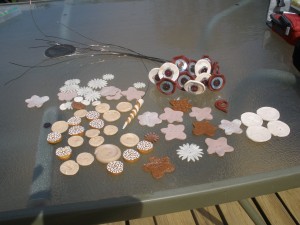
You can see how I shaped the red base buttons to look like flowers. You can also see a few of the random Sculpey buttons I made for more stems. If you do choose to make your own buttons from polymer clay, be advised that it is a lot of work, and will take time. I made this collection over the course of several evenings and a couple of Saturdays:
Keep in mind that you do not have to stick to round buttons. Feel free to go a little wild and try any other ideas you can come up with. I’ve seen bouquets made with Christmas tree ornaments and lights, silk flowers, felted and embroidered flowers… Your only limit is your imagination. Well, you might also want to consider the size and weight of the finished bouquet. 🙂
A few tips:
- Sculpey buttons tend to be heavier than store-bought plastic buttons. This could increase the weight of your finished bouquet quite significantly.
- Buttons do not have to be flat on top, but it may be difficult to place other buttons on top.
- Large fancy buttons can be used on their own.
- It’s difficult to get buttons with shanks to stay upright on a stem. You can remove the shank and glue the button top onto another wired button. Make sure the wired button is large enough to support the glued piece.
- Take care when twisting a button stack if the bottom button is made of Sculpey. If it’s not thick enough, or you twist too tightly, this can happen:
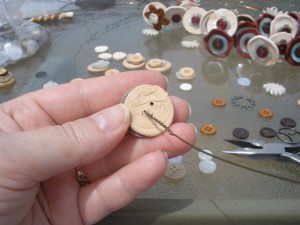
- See how the wire tore through the space between the two holes? Fear not! I cut the wire off, placed a small clear plastic button at the bottom of the stack, and re-wired the stack. The clear button guided the wire and supported the twist, so the button stack wouldn’t slide back down the wire.
- Be careful of hurting your wrists and hands! If you have Carpal Tunnel Syndrome or another RSI or hand injury, twisting the wire and holding small buttons may make your hands and wrists hurt. If so, be sure to take a break, maybe even a day or two, before you continue with your bouquet. Give your body time to rest and heal!
Optional Steps:
- You can start with handmade buttons made from polymer clay, felt, silk flowers (or parts of silk flowers), pieces of jewelry, or shrink plastic (Shrinky Dinks, Shrinkles or even #6 recyclable plastic).
- Polymer clays can be painted and decorated with metal findings or sparkly gemstones after curing (baking).
- You can glue non-button components to buttons that have already been wired.
- You can create stems with tulle gathered onto wire, which can be used as filler or a base just above the bouquet handle.
- You can layer tulle under button stacks for a little extra pizzazz.
- You can make multi-layered tulle “buttons” from small disks of tulle stacked on the wire.
- You can invent new and creative ways of make picks for a bouquet. 🙂
Part II of this tutorial will cover how to create the bouquet. I will link it here when it’s done.
How can I show the latest article of my blogger blog on a different site?s home page?
pre wedding muslim…
I saw this really great post today….
bouquets…
[…]Button Bouquet Tutorial – Part I: Make a Button-Stack Stem – Conspicuous Opulence[…]…