Hey there, fans! (all both of you) Since I need to finish up this tutorial, I thought I’d do that, since I haven’t really had much time to make anything other than a mess in weeks…
Check out Part I or Part II of the tutorial.
Button Bouquet Tutorial, Part III: Putting it all together
OK, I neglected to take photos of this process, but it’s pretty easy, so I hope this makes sense. I’ve turned off comments until the spammers get tired of my site, but you can find me on G+ if you have questions.
OK, to recap, in Part I, we created button stems for our bouquet using a variety of buttons made from a variety of materials. In Part II, we made some tulle stems to add some glamour between the button stems. Now we’ll talk about how to put it all together to make a pretty bouquet.
Here’s what you’ll need to complete your bouquet:
wire cutters
strong tape – use either floral tape or duct tape
decorative ribbon in color of your choice (I used a 2-inch-wide ribbon – wider is quicker)
hot glue gun and hot glue sticks
other decorations (pin, pendant, decorative button…)
Now, you should have a selection of button stems and a large pile of tulle stems. You will build your bouquet from the center out. So, pick out the button stem that you love the absolute most. This will be your top-most stem. Take this stem and pick up 3 or 4 of the tulle stems. Place the button stem in the center, and surround it with the tulle stems. Make sure you can see the button stack in amongst all the tulle. hold the stems together tightly at the base of the button stack and tulle pieces. TIGHTLY twist the wires together, starting at the base of the buttons and tulle. Make sure the buttons and tulle are not doing something crazy, like bending over or facing in a funky direction. Keep twisting the wires together all the way down the stems. Lay this bundle off to one side. Select the next button stem and do the same thing. Repeat for all the button stems.
Once all the button stems are surrounded by tulle stems, and they have all been twisted properly, you are ready to start combining the twisted stems into the final arrangement.
Take your favorite (top) twisted stem, and add another twisted stem. Twist them together. Add another twisted stem. Twist it to the twisted pair. Repeat for all stems.
You may notice that some of your twisted stems become too short to properly twist into the bouquet at some point. When this happened to me, I started using longer pieces of wire to make the tulle stems. This gave me extra wire length to work with. You can also simply twist additional wire into your twisted stems to increase the length.
Once you have twisted all the stems into a bouquet, you will need to trim off some of the wire in the handle. Take a pair of good wire cutters (not “jewelry quality”), and clip off some of the longest wire at the bottom. If you want to make the handle a little shorter, untwist the wire handle a bit, and carefully clip off the excess.
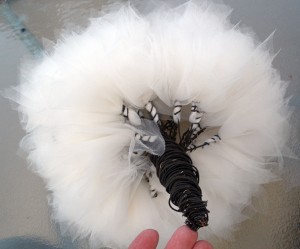
Once you have the handle where you want it, you will need to start taping it up to get it ready for decorating.
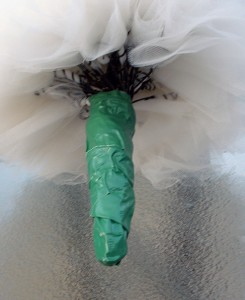
I used green Duct Tape. I could only find 1/2-inch-wide floral tape, and didn’t feel like spending an entire afternoon wrapping the handle. I wrapped it all the way up to the base of the bouquet to keep the twisted ends of wire from poking through. You could also wrap the handle with some padding (foam or batting) before taping it up to make it more comfortable to hold.
Next, you need to make sure your glue gun is good and hot, and loaded with glue. Take a couple feet of decorative ribbon (I used a dark copper wired ribbon), wrap a short “tail” of ribbon around the bottom of handle to cover the ends of wire in the handle. Add some hot glue and CAREFULLY press the ribbon into the glue. I used a plastic knife so I didn’t burn my fingers. Fold the ribbon over, then start winding it up and around the handle toward the base of the bouquet. When you get to the top, place a small dollop of glue on the ribbon, and wrap the tail around to cover the glue. Again, CAREFULLY press the ribbon into the glue, being careful not to burn yourself.
Here’s what you should have now:
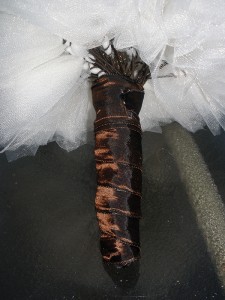
Next, you need to add about 18 – 24 inches of ribbon to cover up the spot where the ribbon wrap ends. You’ll tie this in a bow or something similar. Get your glue gun again, and plop a dollop of glue on the ribbon at the “back” of the handle (figure out which side of the bouquet is the “front”), then place the ribbon CAREFULLY over the glue and pull it into the glue by the tails. Once the glue has cooled, tie the tails into a nice bow. Feel free to plop a little glue on the back of the knot if you like.

Now, for the finishing touch: Find a pretty pin, button or pendant, or some special piece that has special meaning for you, and attach it to the knot in the bow.
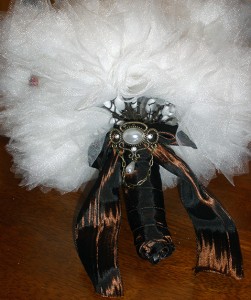
And here is the final bouquet:
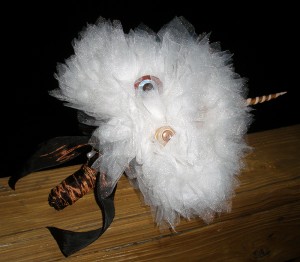
Stay tuned for photos of the finished bouquet…