I’ve been getting back to making art this past week, so I’ve spent a lot of time on YouTube trying to learn more about various styles of art and painting techniques.
I made some large abstract paintings, which was a lot of fun! These were traditional paint-on-canvas-with-a-brush type paintings. Here are photos of the finished pieces:
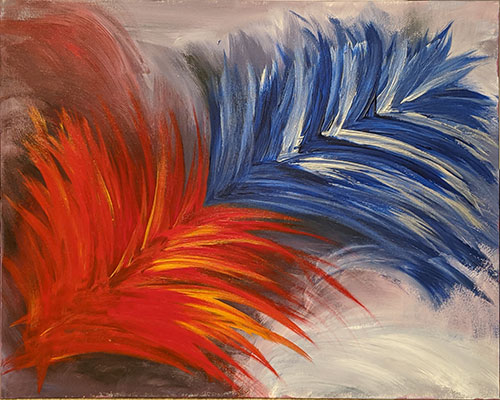
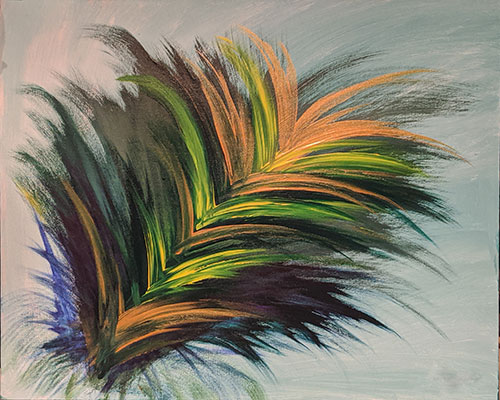
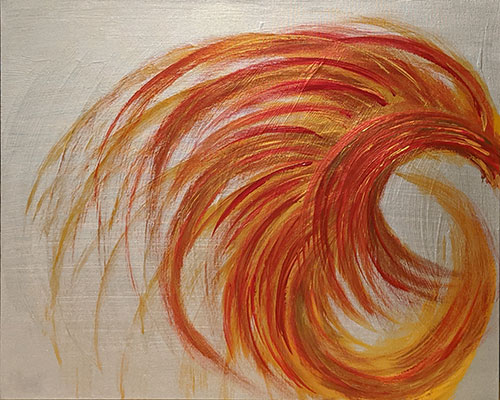
I love how these turned out! There’s a lot of texture in the paint, which I love. The third one also has a lot of texture in the background, but that’s because I didn’t like the original piece I painted, so I painted over it and tried again.
I learned a lot from these paintings. I learned that my first attempt is not necessarily my final outcome. I learned that sometimes I have to take a step back and think about it a while before I’m really finished with a piece. I learned that sometimes a piece needs an unexpected little element before I’m happy with it. I learned that I love metallic paint in a piece, the way it glows and gives life to a painting. I learned that I prefer to paint the background first; I love the background in the top piece most of the three above. I learned that there are no mistakes in painting; sometimes the work takes on a life of its own, and you just have to go with it. And you can just go with it. Or you can choose to start over.
I also spent some time learning about various techniques of poured acrylic painting. At the moment, the technique that most intrigues me is called Dutch Pour. In this technique, paint is thinned to an almost watery consistency. the canvas (or other surface) is flooded with a coat of thinned paint; white paint is often used, but you can use any color for the base that you wish. Additional colors are applied to the flooded canvas, either in a puddle or in a serious of lines. After the additional colors are applied, another flood of the base color is applied around the additional colors. The second flood of the base color is then blown over the additional colors with a blow dryer, just to cover the additional colors. Then the dryer is used again to blow out the colors across the canvas, creating a flowery shape. For a detailed instruction on the basics of Dutch Pour, this YouTube video by Tammy Anderson Art. You can also search YouTube for more tutorials.
After completing the first three paintings above, I tried a small Dutch Pour. As you might have guessed, I learned a lot from it. I learned that my paint was way too thick for this technique, and I have to thin it much more for the next one. I also learned that my blow dryer is not strong enough, and is too long in the nozzle for this technique (and my setup). Finally, I learned that I can’t get the results I’m looking for if I try to skip steps. In other words, I’m lazy. Once it’s dry, I’ll post a photo here. Probably.
UPDATE: No, I won’t post a photo of that other painting. I thought the painting was dry enough to do some quick photos. Propped it up to get a good shot. The paint slid in several areas. So, I scraped the canvas. Then I grabbed a fresh canvas, mixed some paint with Floetrol (like the directions said), and made another painting. I AM NOT TOUCHING THIS ONE UNTIL IT IS DRY! But I did grab a photo of the wet painting:
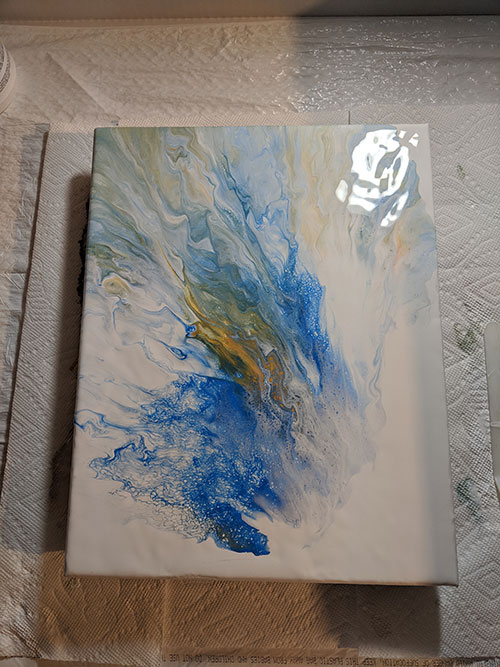
I love how it looks. Hope it doesn’t change much as it dries.
FYI: for this painting, both the base white and the colors (blue, orange, and metallic gold) were mixed about 1:1 with Floetrol as the pouring medium. It worked much better than the first one. I probably should have measured, but I just eyeballed it.